


Pre-Installation Preparation
Proper preparation is essential before installing Bistpower fans. Gather necessary tools and materials, prepare the case for installation, and understand fan specifications to ensure compatibility and optimal performance.
1.1. Tools and Materials Needed
To install Bistpower fans, you will need essential tools such as screwdrivers, mounting screws, cable ties, and thermal tape. Additional materials like wire cutters, pliers, and a torque wrench may be useful for secure installation. Ensure all components are compatible with your system to avoid any fitting issues.
1.2. Case Preparation for Fan Installation
Prepare your PC case by ensuring mounting points are clean and free from debris. Remove any obstructions blocking fan installation areas. Align fan brackets with case holes securely, ensuring proper fitment for optimal airflow. Verify fan orientation matches airflow requirements and that cable management options are accessible for a tidy setup.
1.3. Understanding Fan Specifications (PWM vs. DC)
Understand the difference between PWM and DC fans. PWM fans offer variable speed control through compatible motherboards, optimizing noise and cooling. DC fans run at constant speeds, suitable for simpler setups. Ensure your Bistpower fans match your system’s requirements and connectors for proper functionality and performance.

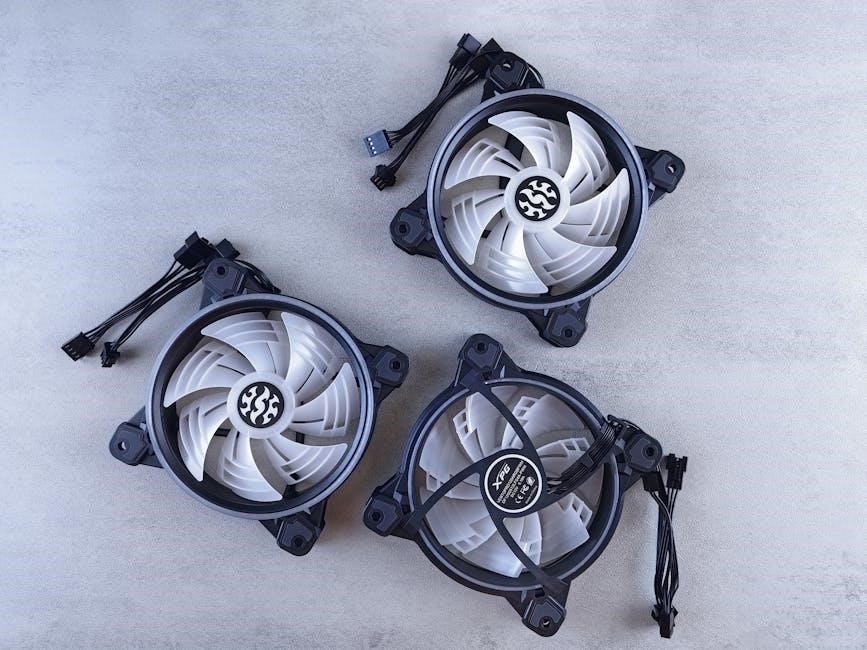
Unpacking and Inspecting the Bistpower Fans
Unpack the Bistpower fans carefully, verifying all contents are included. Inspect for physical damage or defects, ensuring fans and accessories are in perfect condition before proceeding;
2.1. Verifying the Contents of the Package
Open the package and verify all components, including fans, mounting screws, brackets, and power adapters. Cross-check with the packaging list to ensure no items are missing. If any component is missing or damaged, contact Bistpower support immediately for assistance. Properly verifying the contents ensures a smooth installation process without delays.
2.2. Checking for Physical Damage or Defects

Inspect each fan and accessory for visible damage, such as cracks, bent blades, or loose connections. Ensure all wires are intact and properly sleeved. Check for any signs of wear or manufacturing defects. If damage is found, do not proceed with installation; contact Bistpower support for a replacement. This step ensures reliability and optimal performance.
Mounting the Bistpower Fans
Mounting Bistpower fans involves securing them to the case using screws or clips. Ensure proper placement and alignment for optimal airflow and system performance.
3.1. Choosing the Optimal Fan Placement
Optimal fan placement ensures efficient airflow. Typically, front fans intake cool air, while rear and top fans exhaust warm air. Consider case size, layout, and component locations to maximize airflow. Ensure fans are positioned to draw cool air into the case and expel warm air effectively. Proper placement enhances cooling performance and system stability.
3.2. Securing the Fans to the Case
Align the fan with the case’s mounting holes. Secure it using provided screws, ensuring a snug fit. Tighten firmly but avoid over-tightening to prevent damage. Connect the fan to the motherboard or fan controller, following the wiring diagram. Properly routing cables ensures a clean setup and optimal airflow. Double-check all connections for stability and functionality before closing the case.
3.3. Ensuring Proper Alignment and Fitment
Before finalizing, ensure the fan is perfectly aligned with the case’s mounting holes. Verify the fan is flush with the case and free from gaps. Check that the fan blades have adequate clearance to rotate without obstruction. Proper alignment prevents vibration and ensures optimal airflow. Test the fan’s rotation to confirm smooth operation and even fitment within the case design.
Connecting the Fans to the System
Connect the fans to the motherboard or power supply, ensuring proper alignment of pins and connectors. Use the provided cables for a secure and stable connection. Configure fan settings in the BIOS or software to optimize performance and noise levels. Ensure all wires are neatly routed for a clean and efficient setup.
4.1. Wiring the Fans to the Motherboard
Connect the Bistpower fans to the motherboard by aligning the fan connectors with the appropriate ports. Use the provided PWM or DC cables, ensuring secure connections. For PWM fans, attach the four-pin connector to a PWM header. For DC fans, connect the three-pin or two-pin cable to a DC fan header. Avoid incorrect connections to prevent damage or malfunction. Test the fans to confirm proper operation.
4.2. Configuring Fan Speed Settings in the BIOS/Software
Access the BIOS or motherboard software to configure fan speed settings. Enable PWM control for Bistpower fans if available. Set custom fan curves based on temperature thresholds for optimal performance. Use software tools like Bistpower Control Center to monitor and adjust fan speeds in real-time. Ensure settings are saved to maintain configuration during system restarts for consistent cooling and noise levels.
4.3. Managing Cables for Clean Setup
Secure fan cables using cable ties or clips to prevent entanglement and improve airflow. Route cables behind the motherboard tray or through cable management holes. Use zip ties to bundle excess wiring and fasten them to the case. Ensure all connections are accessible and neatly organized for a clean, professional-looking installation. This enhances aesthetics and prevents obstruction of internal components.

Post-Installation Testing
Confirm fan operation, airflow, and system stability. Ensure fans run smoothly, cool effectively, and maintain consistent performance under various loads. Verify all functions meet expectations for optimal system operation.
5.1. Verifying Fan Rotation and Speed
Power on your system and observe fans for smooth rotation; Use software tools to check RPM and ensure speeds match settings. Listen for unusual noise and confirm fans operate within expected ranges. Verify speed adjustments via BIOS or software for consistent performance and proper cooling efficiency across different system loads and conditions.
5.2. Checking for Proper Airflow and Cooling
Ensure fans are drawing in cool air and expelling hot air effectively. Verify airflow direction aligns with case design, maintaining proper intake and exhaust balance. Monitor system temperatures during operation to confirm cooling efficiency. Use thermal monitoring tools to track temperature changes under load, ensuring optimal heat dissipation and system stability. Adjust fan settings if necessary for balanced performance and noise levels.
5.3. Running Stress Tests to Ensure Stability
After installation, run stress tests using software like Prime95 or AIDA64 to simulate heavy workloads. Monitor CPU, GPU, and system temperatures to ensure consistent cooling performance. Check fan speed adjustments under stress to confirm they maintain optimal temperatures. This step validates the system’s thermal stability and ensures reliable operation under demanding conditions, confirming the fans’ effectiveness in heat management.

Troubleshooting Common Issues
Troubleshoot common issues like uneven cooling, noise, or connectivity problems. Identify and resolve these promptly to ensure system reliability and optimal performance.
6.1. Dealing with Fan Noise or Vibration
If your Bistpower fan is noisy or vibrating excessively, check for loose screws, improper mounting, or dust buildup. Ensure the fan is securely fastened and properly aligned. Clean dust from blades and bearings. Consider using rubber mounts or vibration-dampening pads for smoother operation. If issues persist, contact Bistpower support for assistance or replacement options.
6.2. Resolving Connectivity or Power Issues
If your Bistpower fan isn’t spinning or receiving power, verify all cable connections to the motherboard or power supply. Ensure the power cable is securely plugged in and the motherboard port is functional. Check the PSU for adequate power capacity. If issues persist, test the fan on an alternate power source or consult the motherboard manual for correct port configurations. Contact Bistpower support for further troubleshooting.
6.3. Addressing Overheating or Performance Problems
If your system overheats or fans underperform, inspect fan placement and airflow paths. Ensure fans are correctly oriented for intake or exhaust; Verify that fan curves are properly configured in software. Clean dust from fans and radiators to maintain efficiency. Consider adding more fans or upgrading to a better cooling solution if temperatures remain high. Monitor system performance during heavy workloads.
Maintenance and Upkeep
Regularly clean fans and surrounding areas to prevent dust buildup. Check for loose screws and ensure proper fan function. Monitor performance to maintain optimal cooling efficiency.
7.1. Cleaning the Fans and Surrounding Areas
Use compressed air to gently remove dust from fan blades and grills. Avoid liquid cleaners to prevent damage. Wipe surrounding areas with a soft cloth to ensure proper airflow. Regular cleaning prevents dust buildup, which can reduce fan efficiency and increase noise. Clean every 2-3 months for optimal performance and longevity of your Bistpower fans.
7.2. Lubricating Fan Bearings (if applicable)
Lubricate fan bearings every 6-12 months using a high-quality, non-conductive lubricant. Apply a small drop to the bearing axle, avoiding over-lubrication. Gently spin the fan to distribute the lubricant evenly. This reduces friction, minimizes noise, and extends the lifespan of the fan. Note that not all fans require lubrication, so check your Bistpower fan specifications first.
7.3. Monitoring Fan Performance Over Time
Regularly monitor your Bistpower fans’ performance to ensure optimal cooling and reliability. Check for consistent speed, noise levels, and airflow efficiency. Use software tools like SpeedFan or HWMonitor to track RPM and temperature changes. Address any irregularities promptly, such as reduced airflow or increased noise, by cleaning or adjusting settings. This proactive approach prevents overheating and maintains system stability over time.
Advanced Customization Options
Enhance your setup with custom fan curves, RGB lighting, or integrating fans into a cooling loop for superior performance, aesthetics, and system optimization.
8.1. Custom Fan Curve Setup for Optimal Performance
Configure custom fan curves to balance noise and cooling efficiency. Access BIOS or use software tools to set temperature-based fan speed thresholds. Start with conservative settings, monitor system temperatures during various workloads, and adjust curves to optimize performance and minimize noise. This ensures your Bistpower fans operate efficiently under all conditions.
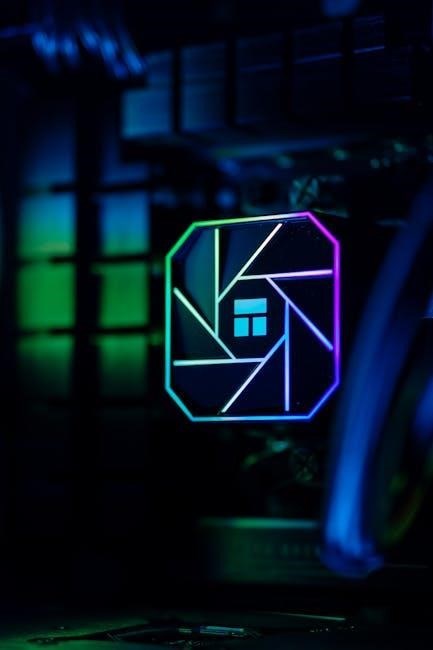
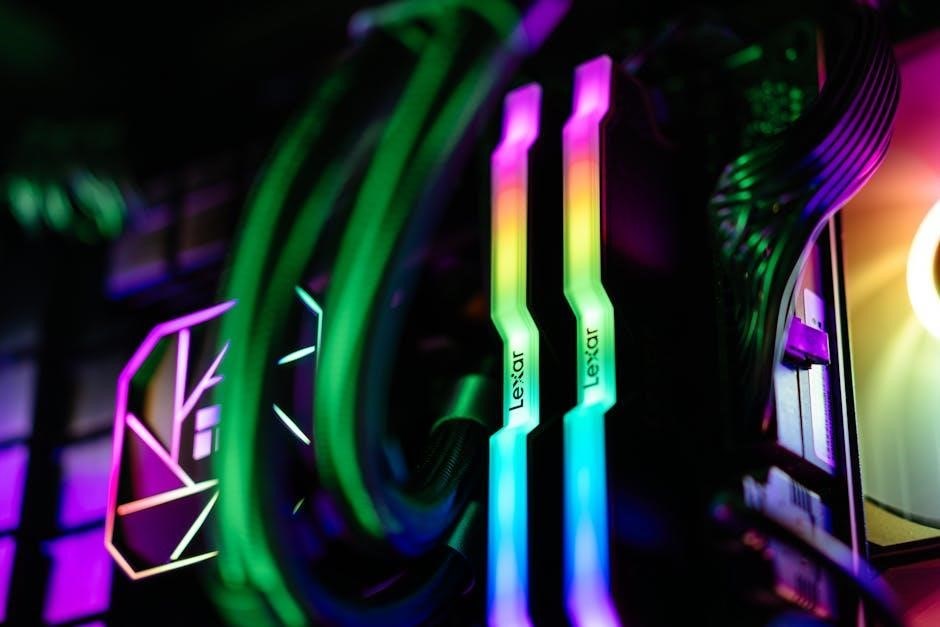
8.2. Enhancing Aesthetics with Lighting or Accessories
Elevate your system’s visual appeal by adding RGB lighting or stylish accessories. Bistpower fans often support customizable lighting, allowing you to synchronize colors with other components. Use optional brackets or decorative grilles to enhance the overall look. Ensure these additions align with your PC’s color scheme and design for a cohesive aesthetic without compromising functionality or airflow performance.
8.3. Integrating Fans into a Custom Cooling Loop
For advanced setups, integrate Bistpower fans into a custom cooling loop by pairing them with radiators and tubing. Ensure compatibility with your loop’s components and configure fans to optimize coolant flow. Plan the loop carefully to avoid conflicts with case internals. Use appropriately sized tubing and radiators for efficient cooling performance and minimal noise.
Safety Precautions and Best Practices
Always handle electrical components with care, avoid over-tightening screws, and ensure proper ventilation during installation. Keep work areas clean and well-lit for safety and accuracy.
9.1. Handling Electrical Components Safely
- Always unplug your PC before handling electrical components to prevent accidental power-ons or shocks.
- Use an anti-static wrist strap to discharge static electricity, protecting sensitive parts from damage.
- Avoid touching electrical contacts or components to prevent damage or risk of electric shock.
- Follow proper grounding procedures to ensure safety for both you and your equipment.
- Handle fans by the frame, avoiding the blades or motor housing to prevent physical damage.
- Never force connections, as this can lead to electrical issues or component failure.
- If unsure about any step, consult the manual or seek professional assistance.
9.2. Avoiding Over-Tightening or Misalignment
When securing Bistpower fans, avoid over-tightening screws, as this can damage the case or fan mounting holes. Use the correct screw type and length to prevent stripping threads. Ensure fans are properly aligned with the case openings to maintain airflow efficiency and reduce noise. Check alignment before final tightening and avoid uneven pressure, which can lead to misalignment issues.
9.3. Ensuring Proper Ventilation During Installation
Ensure the workspace is well-ventilated to prevent dust and debris from interfering with the installation. Keep the PC case open to maintain airflow and avoid trapping heat. Use compressed air to clean out dust before installing fans. Ensure all vents and grills are unobstructed and properly aligned for optimal airflow. Proper ventilation during installation helps maintain system efficiency and prevents overheating issues.

Warranty and Support Information
Bistpower fans are backed by a limited warranty covering manufacturing defects. For support, contact their customer service team via email or visit their official website for assistance.
10.1. Understanding the Warranty Coverage
Bistpower fans come with a limited warranty that typically covers manufacturing defects for a specified period, often one to three years. The warranty usually includes repair or replacement of faulty units, ensuring reliable performance. Registration may be required to activate full benefits. Always review the warranty terms provided with your purchase for exact details and conditions. Proper installation is essential to maintain warranty validity.
10.2. Contacting Bistpower Support for Assistance
For any inquiries or issues with your Bistpower fans, contact their support team via the official website, email, or phone. Support is typically available 24/7, with a dedicated team ready to assist. Ensure you have your product serial number and a detailed description of the issue for faster resolution. Bistpower’s customer service aims to provide timely and effective solutions to ensure customer satisfaction.
10.3. Registering the Product for Extended Benefits
Registering your Bistpower fan ensures extended warranty coverage and access to exclusive updates. Visit the official Bistpower website, navigate to the support section, and fill out the registration form with your product details and purchase receipt. This process activates additional benefits, such as priority customer support and firmware updates, enhancing your ownership experience.
Successful installation ensures optimal cooling and system performance. Follow the final checklist, plan future upgrades, and maintain your fans for long-term reliability and efficiency.
11.1. Final Checklist for Successful Installation
- Verify all fans are securely mounted and aligned properly.
- Ensure connections to the motherboard and power supply are correct.
- Confirm fans are spinning at appropriate speeds and directions.
- Check for proper airflow and cooling performance.
- Test fan controls in BIOS/Software for functionality.
- Organize cables neatly for a clean and safe setup.
11.2. Tips for Future Upgrades or Modifications
Plan ahead for future upgrades by ensuring easy access to fans and cables. Consider upgrading to PWM fans for better control. Label cables for easier management during modifications. Keep the system clean to avoid dust buildup. Research compatible fan models before making changes. Always unplug power before modifying fan setups. Backup settings in BIOS/Software for quick restoration.
11.3. Importance of Proper Fan Installation for System Longevity
Proper fan installation ensures optimal airflow, preventing overheating and extending hardware lifespan. Correct alignment and secure mounting prevent vibration and noise. Efficient cooling maintains performance and avoids thermal throttling. Regular maintenance, like cleaning, sustains fan efficiency. Proper installation safeguards against dust buildup, enhancing reliability. It ensures silent operation and maximizes system longevity, protecting investments in high-performance components.
Additional Resources
Explore official Bistpower guides, community forums, and video tutorials for comprehensive support. These resources offer troubleshooting tips, installation insights, and expert advice to enhance your setup experience.
12.1. Official Bistpower Installation Guides
The official Bistpower installation guides provide comprehensive, step-by-step instructions tailored for their fans. These detailed manuals include diagrams, compatibility information, and troubleshooting tips. Ensure you reference the specific guide for your fan model to optimize performance and avoid common pitfalls. Available on the Bistpower website, these resources are indispensable for a seamless installation experience.
12.2. Community Forums for Troubleshooting
Community forums are excellent for troubleshooting Bistpower fan installations. Users freely share their personal experiences, practical solutions, and expert advice, offering diverse perspectives and insights. These interactive platforms foster collaboration, enabling enthusiasts to collectively resolve common issues and challenges. Experienced users and knowledgeable moderators provide valuable support, making forums a trusted and reliable resource for all installation-related troubleshooting needs and queries.
12.3. Video Tutorials for Visual Learners
Video tutorials provide a visual and interactive guide for Bistpower fan installation, making complex steps easier to follow. These tutorials often include detailed close-ups, step-by-step instructions, and real-time demonstrations. Available on official Bistpower channels and third-party platforms, they cover installation, wiring, and troubleshooting. Videos cater to visual learners, ensuring a smoother and more efficient installation process with clear, actionable guidance.