


A tailor body measurement chart is an essential tool for achieving precise fits in sewing projects. It provides a structured way to record key measurements, ensuring accuracy and consistency. These charts are customizable, allowing adaptation for different garment types and personal preferences. They serve as a valuable resource for both beginners and experienced sewists, helping to create garments that flatter and fit perfectly. By using a tailor body measurement chart, you can streamline your sewing process and achieve professional results effortlessly.
Importance of Accurate Body Measurements in Sewing
Accurate body measurements are fundamental for achieving a flawless fit in sewing. They ensure garments are neither too tight nor too loose, enhancing comfort and appearance. Sewing patterns rely on precise measurements to adapt designs to individual body shapes, making customization possible. Without accurate measurements, even the most skillfully crafted garments may require alterations. Using a tailor body measurement chart helps avoid costly fabric waste and saves time by minimizing the need for adjustments. It also allows for consistent results, ensuring every project meets professional standards. By prioritizing precise measurements, sewists can create garments that truly flatter and fit perfectly.
Overview of the Tailor Body Measurement Chart for Sewing PDF
The Tailor Body Measurement Chart for Sewing PDF is a comprehensive tool designed to streamline the measuring process. It includes detailed tables for recording essential measurements like chest, waist, hips, and more. This chart is versatile, catering to various garment types and body shapes, and offers both inches and metric units for global use. It also provides guidance on how to take measurements accurately, ensuring consistency and reliability. The PDF format allows for easy printing and customization, making it a practical resource for sewists. Additionally, it includes diagrams and instructions to help users interpret and apply measurements effectively in their sewing projects.
How to Take Body Measurements for Sewing
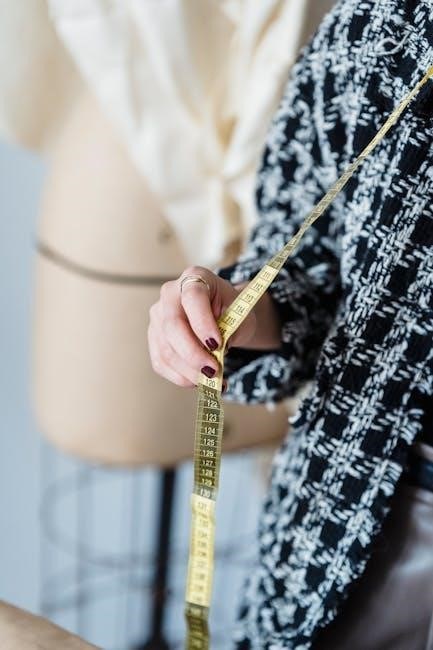
Use a flexible tape measure to record accurate body measurements. Ensure the tape is level and not too tight. Measure in the same spot each time for consistency.
Essential Body Measurements for Tailoring
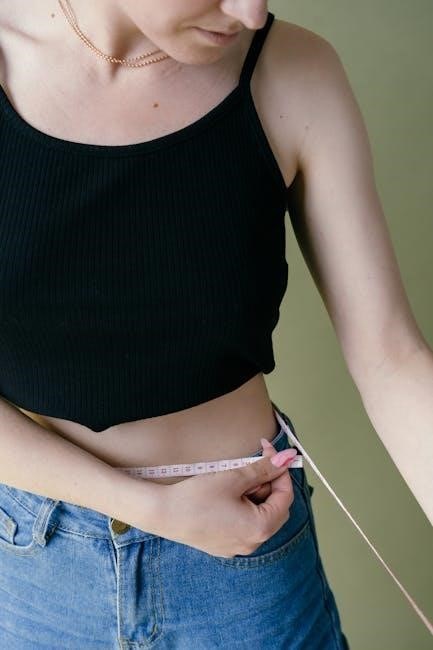
Key measurements include chest, waist, hips, body rise, shoulder slope, and arm length. Chest is measured around the fullest part, ensuring the tape is level. Waist is taken at the narrowest point, while hips are measured 7-9 inches below the waistline. Body rise is crucial for pants, measured from the crotch to the waist. Shoulder slope and arm length ensure proper fit for sleeves. Accurate measurements are vital for creating well-fitted garments. Consistency is key, so always measure in the same spots. Use a flexible tape measure and keep it level for precise results.
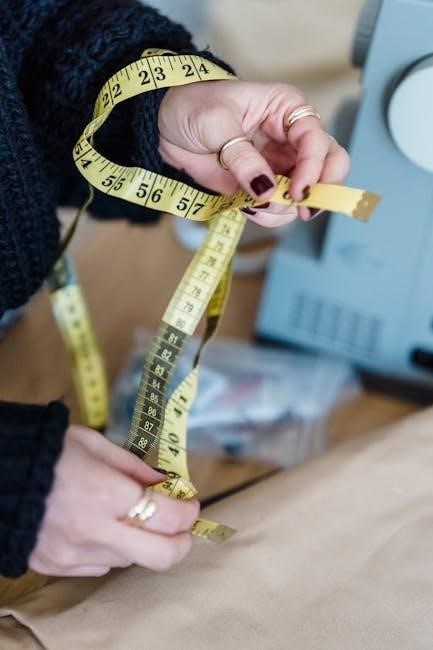
Tools and Techniques for Accurate Measurement Taking
Accurate measurement taking requires the right tools and techniques. A flexible tape measure is essential for capturing body contours. Stand upright and keep the tape level to ensure precise results. Use a full-length mirror to verify proper placement. For hard-to-reach areas, enlist a helper or use a self-measuring technique. Record measurements consistently, using the same method each time. Measure over the same undergarments and footwear for uniformity. Refer to a measurement guide to locate key points, such as the natural waistline or hip line. Taking multiple measurements and averaging them ensures reliability. Store results in a tailor body measurement chart for easy reference and pattern adjustments.

Understanding the Tailor Body Measurement Chart
The tailor body measurement chart is a detailed guide for recording essential body measurements, such as chest, waist, and hip circumference, to ensure accurate garment fitting. It helps sewists create custom-fit patterns and adapt designs to individual body types, making it a cornerstone for professional sewing results.
Key Components of the Chart
The tailor body measurement chart includes essential metrics like chest, waist, and hip circumferences, as well as body length and shoulder width. It often features diagrams illustrating where to measure, ensuring accuracy. The chart may also include sections for noting fabric requirements and pattern adjustments. Some versions allow for tracking changes over time, making it a versatile tool for both sewing and fitness goals. The structured layout helps organize data effectively, making it easy to reference during garment construction. This comprehensive approach ensures that all necessary measurements are captured for a perfect fit every time.
How to Use the Chart for Sewing Patterns
The tailor body measurement chart is a crucial tool for sewing patterns, enabling precise adjustments for a perfect fit. Begin by taking accurate measurements and recording them in the chart. Compare these measurements with the sewing pattern requirements to identify necessary adjustments. Use the chart to calculate fabric needs and make alterations, ensuring a flattering fit. Regular updates help maintain accuracy over time. This method streamlines the sewing process, making pattern customization both efficient and effective.
Customizing the Measurement Chart
Customizing the measurement chart allows you to adapt it to specific garment types and add personalized fields, ensuring precise fits and enhancing sewing accuracy.
Adapting the Chart for Different Garment Types
Adapting the measurement chart for various garments ensures a perfect fit for each type of clothing. For dresses, measure sleeve length, bust, and waist. For trousers, note inseam, outseam, and waist. Shirts require chest, shoulder, and arm length. Hem allowances and fabric stretch can also be noted. This customization ensures that the chart caters to the specific needs of each garment, making it versatile for all sewing projects. By adjusting the chart, you can maintain consistency and accuracy across different clothing types, ensuring a professional finish every time. This flexibility makes the chart indispensable for tailors and home sewists alike.
Adding Personalized Fields for Specific Measurements
Personalizing your body measurement chart allows you to cater to specific sewing needs. Add fields for niche measurements like sleeve length, crotch depth, or hem allowances. For tailored suits, include shoulder slope or collar height. Custom fields for waistcoat or corset measurements can also be added. This ensures the chart remains adaptable to unique garment requirements. By incorporating personalized fields, you can track measurements critical to your projects, enhancing accuracy and fit. This feature is especially useful for creating custom patterns or altering existing ones, making the chart a tailored tool for your sewing goals.
Downloadable PDF Resources
Downloadable PDF resources offer convenient access to tailor body measurement charts. These printable files provide structured templates to record measurements accurately. Visit websites like 101planners.com for free, customizable options.
Where to Find Free Printable Body Measurement Charts

Free printable body measurement charts are widely available online, offering convenient tools for sewists and DIY enthusiasts. Websites like 101planners.com provide customizable PDF templates designed for sewing projects. These charts often include fields for essential measurements such as bust, waist, hips, and more. Many platforms, including Simplicity and PintoPrintables, offer downloadable resources that cater to different garment types and personal preferences. Additionally, some sites allow users to edit and tailor charts to specific needs, ensuring versatility. These resources are easily accessible and printable, making it simple to track and use measurements for sewing projects.
How to Print and Use the PDF Chart
To print the tailor body measurement chart, ensure your printer is set to the correct paper size, such as A4 or A5. Download the PDF and print it on high-quality paper for clarity. Once printed, fill in the measurements systematically, starting with essential ones like chest, waist, and hips. Use a bullet journal style for organizing multiple measurements over time. For accuracy, measure consistently and note the date of each entry. This chart is reusable, allowing you to track changes and updates easily. It’s a practical tool for achieving precise fits in sewing projects, ensuring your garments are tailored to perfection.
Advanced Techniques for Tailors
Advanced tailors utilize measurement charts to calculate fabric requirements and craft custom-fit garments. These techniques ensure precision, enhancing the professionalism and quality of tailored pieces significantly.
Using Measurements to Calculate Fabric Requirements
Calculating fabric requirements is a critical step in sewing, ensuring projects are completed efficiently. By using body measurements from a tailor’s chart, you can determine the exact yardage needed for garments. This involves analyzing patterns, considering fabric width, and accounting for seam allowances. Accurate measurements help prevent fabric waste and ensure a perfect fit. For example, measuring chest circumference and hip width allows tailors to estimate fabric needs for dresses or shirts. Additionally, understanding fabric types and their stretch properties further refines calculations. This method ensures that every project is well-planned and executed with minimal excess material. Proper calculation enhances both creativity and resource management.
Applying Measurements to Create Custom Fit Garments
Accurate body measurements are fundamental for crafting garments that fit perfectly. By using a tailor’s measurement chart, you can adjust patterns to match your unique proportions. This ensures that every seam, sleeve, and hem aligns flawlessly with your body. Understanding your measurements allows you to make precise alterations, such as adjusting sleeve lengths or waistbands. Additionally, knowing your fabric requirements helps in selecting the right material for your project. This personalized approach guarantees that your garments are not only comfortable but also flattering, making the sewing process both efficient and rewarding. Custom-fit garments reflect attention to detail and a deep understanding of personal style.
Using a tailor body measurement chart ensures accuracy and customization, leading to garments that fit perfectly. Regular updates and precise techniques guarantee professional results and satisfaction in every stitch.
Best Practices for Maintaining and Updating Measurements

Consistency is key when maintaining and updating body measurements. Schedule regular measurement sessions, ideally every 2-3 months, to track changes. Use the same tools and techniques each time for accuracy. Store your measurements in a dedicated chart or digital file, ensuring easy access and comparison. Note any significant changes and adjust patterns accordingly; Consider taking measurements at the same time of day and in the same clothing for reliability. Keeping organized records helps identify trends and ensures garments fit perfectly over time. Regular updates also allow for quick adjustments, minimizing the need for alterations and ensuring a polished finish.
Final Tips for Achieving Professional Results
For professional results, ensure accurate and consistent measurements by using a flexible tape measure and taking notes in good lighting. Double-check measurements before cutting fabric, as small errors can lead to fit issues. Practice patience and invest time in perfecting your technique. Store your measurements in a dedicated chart or digital file for easy reference. Regularly update your records to reflect body changes. Consider enlisting a helper for hard-to-measure areas. Organize your tools and patterns neatly to streamline the sewing process. With dedication and attention to detail, you’ll achieve garments that fit flawlessly and look professionally made.